
Step 1: Designing the 3D Model
A successful 3D printing project requires starting from the development of the 3D model design. Users should employ computer-aided design (CAD) applications at this fundamental stage that adapt to many skill levels. New users can use the user-friendly design software Tinkercad and SketchUp to create straightforward models because both platforms provide simple interfaces. Advanced users who need precise design capabilities should use professional CAD software such as SolidWorks along with Autodesk Fusion 360 because these applications provide complex advanced tools. 3D models require designers to manage three essential elements: size, scale and complexity during the designing phase. A perfect model achieves functional and aesthetic standards while also maximizing the abilities of the selected 3D printer tool. One must know printing material limitations including overhang capabilities alongside respecting the printer resolution and total print space constraints. A proper design preparation for 3D printing requires your model to possess manifold characteristics with no holes and non-manifold edges while maintaining a continuous closed surface. The model must have sufficient wall thickness for handling purposes and normal use because weak areas will not support heavy usage. Designers enhance printability through the addition of chamfered and filleted features because these elements strengthen the model structure and support the printing procedure. The design phase stands as the foundation for successful execution of the 3D printing workflow. The printer output becomes more successful when designers implement CAD tools correctly while following design standards and optimize model features for printing applications. Effective attention to detail leads to better production outcomes between digital drawings and actual products.
Step 2: Slicing the Model
After designing the 3D model with great attention to detail comes the step which requires slicing software execution. This essential transformation makes the complex 3D model ready for interpretation by a 3D printer as the software converts it into stackable layers the printer will use for reproduction. Through conversion software the model receives analysis that leads to the creation of G-code files comprising step-by-step directions for the printer that include position instructions and material discharge rates. The layer height represents one of the essential variablesSlice software users need to adjust. The printing speed alongside quality depends on the value users set for layer height settings. Users who select tiny layer heights get superior modeling details combined with smoother final surfaces but they must accept longer printing durations. Print speed enhances due to a bigger layer height at the cost of reduced print surface quality. The users need to evaluate their project needs before making changes to this parameter. Among the key elements for successful model slicing stands the print speed parameter. The printer head speed during printing operations is controlled through this particular setting. Modifying the print speed changes both printing duration and final quality characteristics. The speed at which the printer moves affects the accuracy and layer bonding but slower speeds result in both accuracy improvement and longer printing duration. Printers require support structures in cases of complex designs that feature overhangs or intricate geometries to succeed. Implementing different types of support options within the slicing software affects the ease of post-processing steps while simultaneously determining the overall print integrity. The decision making process for selecting suitable slicing software must receive the highest consideration because it fits with individual printing requirements. Users who study slicing software functions and settings will achieve better 3D print results through optimized slicing operations.
Step 3: Preparing the 3D Printer
The successful slice of the 3D model forms the basis for printer preparation at the next step of the 3D printing process. Printer setup for a proper configuration stands as an essential part that directly affects the quality of printed objects. The first step requires calibration to maintain axis perfection which results in accurate print outputs. The quality of 3D printer outputs depends on proper adjustment because print defects result from misalignment which inflicts problems like failed prints and uneven layers. A proper temperature setup for both nozzle and print bed needs attention after finishing calibration. The temperature range for each material exists as an essential requirement that ensures correct adhesion and layer fusion and must always be followed strictly. Printing services which use PLA need 200°C for nozzle setting although ABS requires elevated temperatures as a standard. The temperature of the print bed strongly affects warping control and greatly improves material adherence rates. PLA requires a printer bed temperature between 50°C to 60°C but ABS needs temperatures between 90°C to 110°C. The success of any print job depends on selecting appropriate materials for that job. Filament quality deterioration together with improperly stored or incompatible materials produces unreliable extrusion and blocks the nozzles which leads to printing defects. A comprehensive examination of filament material for both moisture and tangles should occur prior to beginning the printing process. A test print allows users to detect and solve potential problems as the process begins. Two main printer setup mistakes stem from temperature problems along with weak bed sticking which producers can prevent through regular monitoring and yapmışası. A thorough reference check of the printer configuration according to its manufacturer documentation will help users resolve technical issues.
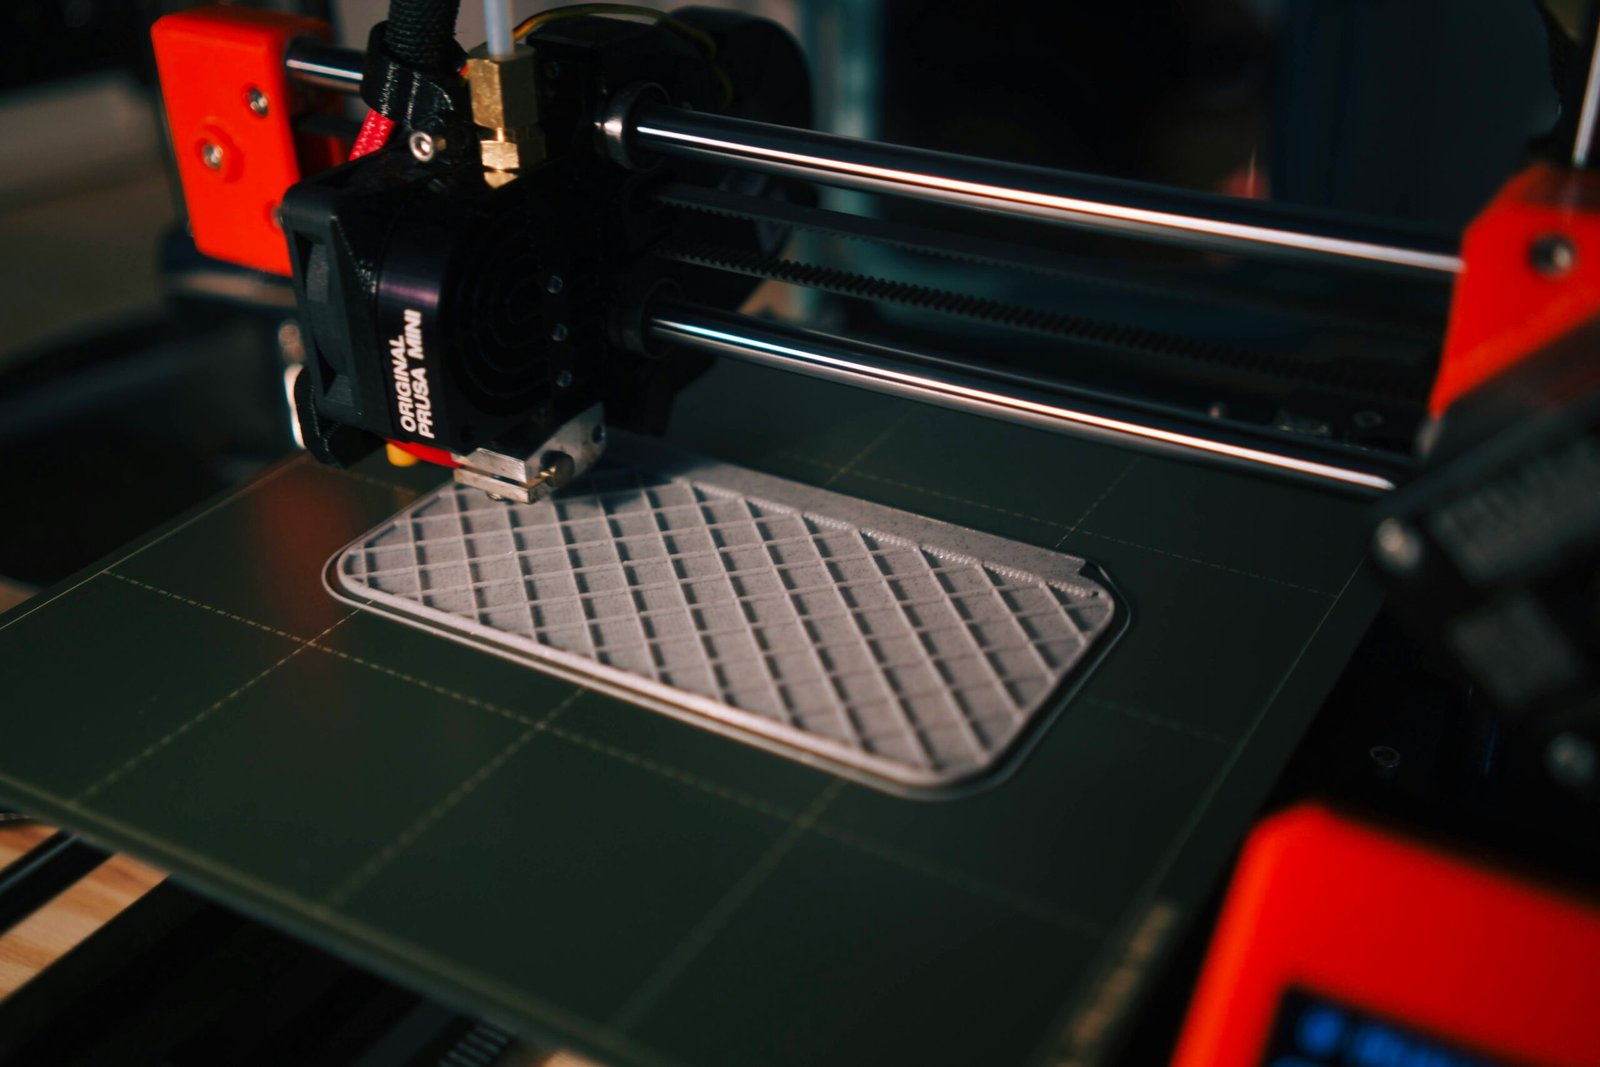
Step 4: Printing the Model
During the printing stage in 3D printing operations the digital model gets transformed into a physical object by processing layers which were originally sliced from the digital model. The printing procedure starts following model slice preparation through slicing software which produces necessary G-code that guides the 3D printer through creating elements based on layer construction. The essential aspect of understanding different 3D printing technologies includes Fused Deposition Modeling (FDM) and Stereolithography (SLA) and Selective Laser Sintering (SLS because each printing technology has its own unique printing characteristics and requirements that determine the final outcome. The start of the printing procedure demands constant observation from the operator. Regular observation enables users to identify printer functioning issues so they can prevent them from becoming major problems. The primary printing problems that occur consist of warping alongside failures of layer bonding and clogged nozzles. Immediate identification of printing issues is essential to keep quality prints and make printing processes work successfully. The following guidelines will help users achieve their desired printing outcomes during the printing procedure. A properly levelled build plate serves as an essential factor which determines first-layer adhesion since poor adhesion causes print failure. The ambient temperature needs to stay at its correct level because warping-prone materials require this condition. The extrusion reliability along with better printed object finish depends on both drying the filament and clearing it from contaminants. The duration of 3D printing operations together with end product appearance depends heavily on three elements: layer thickness, print velocity and infill patterns. The knowledge of these factors will help optimize the printing procedure while obtaining successful end results. Learning to recognize these printing characteristics helps individuals create top-quality printed models that follow exact project specifications
Post-Processing the 3D Print
The final stage in the 3D printing process is post-processing, a crucial phase that allows for the enhancement of the printed model’s aesthetics and functionality. After the 3D print has been completed, the model may present visible artifacts or imperfections due to the nature of additive manufacturing. Thus, various techniques can be employed to elevate the quality of the final product.The concluding stage of 3D printing involves post-processing operations because these operations improve both appearance and functionality of the printed model.3D printed models usually show visible artifacts because of additive manufacturing traits after their printing cycle ends.Different methods exist to improve the quality standards of finished products.The act of sanding represents a well-known post-processing approach because experts use it to produce a smooth surface on 3D prints by removing layer lines and other defects.The surface finish along with appearance quality improves when this method is applied.A sequence of sandpaper abrasiveness works for sanding additive manufactured items by using coarse first to remove large irregular shapes then progressively moving to increasingly refined abrasiveness to achieve smoothness.Printing objects with demanding details requires this step because it makes the surface ready for upcoming completion methods.Printing serves as a fundamental component of post-processing because the additional application of paint enables improved aesthetic value for the printed objects.A clean surface that has appropriate primer coat increases the chances of paint adherence.The color and final presentation of a model gets significantly better when you select proper paints along with the proper method such as spray paint or airbrush technique.Implementing a protective coating following painting will provide durability alongside protection against normal wear.Strategic post-processing includes assembling different printed elements to complete the final product.The model needs stability reinforcement through gluing components together and applying mechanical fasteners.Multiple post-printing operations add visual appeal to printed models and concurrently enhance their operational capabilities and durability thus emphasizing the critical nature of finishing steps for obtaining top-quality 3D prints.